Laptop PSU Splitter for Monitor
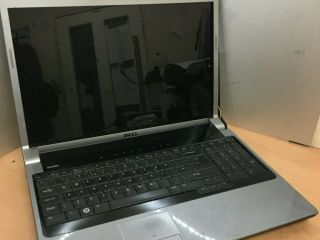
I picked up a broken Dell Studio 1715 off E-Bay for £10, with the aim of using its 17" LCD panel as an ultra portable monitor.
Here's how I made the monitor and built a rather neat unit to split the output from my laptop's PSU to allow it to drive the monitor as well as my regular laptop at the same time.
The Cardboard Monitor
I wanted to have a small, portable, monitor for use with my laptops, one that would fit in a suitcase. So I bought a broken Dell Studio 1715 laptop with a 17" 1400 x 900 LCD panel off E-Bay for £10. There was no guarantee that the panel was working, but I took a punt, and lucked out. At £65 plus for a single panel off E-Bay I figured I could do this a few times if necessary!
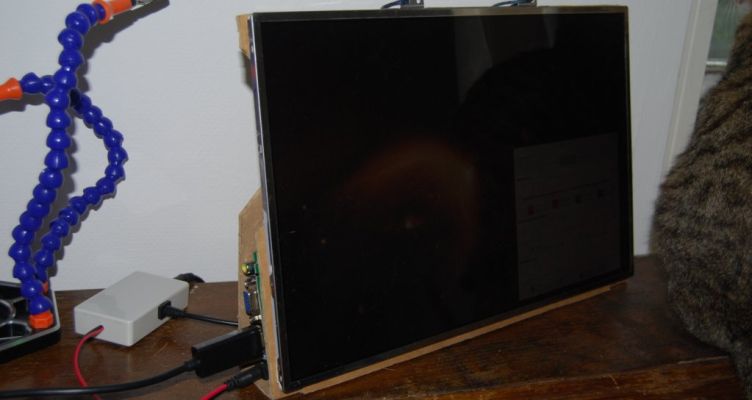
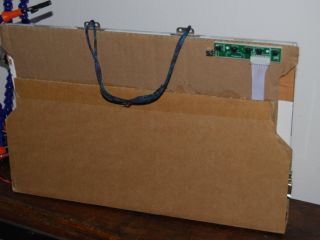
To keep the weight down I used some strong corrugated cardboard (from a high quality LP mailer) as the monitor's body. See the pictures to get an idea of the layout.
I'm not going to go into any detail on how one turns an LCD panel into an external monitor, there's already tons of content on that online. Use this Search for LCD Panel to External Monitor to find the details. There are links to all the parts I used at the bottom of this article.
A rough guide to the cost of this project is around £45 all inclusive. Some items were bought in bulk, this is a per unit estimate.
Portable Power
The controller board that I used requires a 12V 3A power supply. While I have suitable adaptors lying around, it was one more heavy thing to carry and one more mains socket to find when using it.
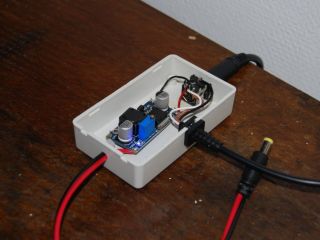
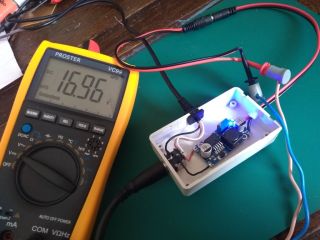
The white box you see in the photographs is a simple device that the laptop's PSU plugs into. This is a power splitter that uses a DC/DC Buck converter to provide a 12V supply into a line that plugs into the monitor and passes through the original PSU power to a cable that goes on to the laptop.
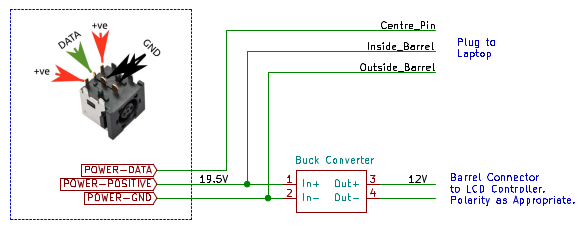
It's important to get the correct socket and plug leads for the laptop. The Dell (and HP) version that I built has a third, data, wire that needs to be connected for the laptop to recognise the PSU. The diagram below shows the connections from the PCB power socket to the buck converter and the extension cable to the laptop.
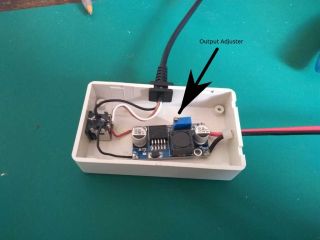
I had a plastic project box, approximately 80mm x 50mm x 20mm, that was perfect for this. The pictures below show the finished unit and should provide you with enough information to recreate it.
The socket for the laptop PSU input is a PCB mount item, I used contact adhesive to secure it to the box and it's held fine. The buck converter is stuck to the box with double sided tape.
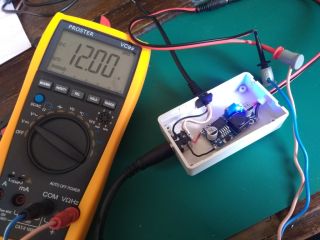
When wired up, adjust the buck converter to output the required 12V. The pictures show the adjustment on my unit and shows where to adjust the converter.
In use the box gets a little warm, but not hot enough that any ventilation is required.
And as a Bonus...
The Studio 1715 laptop was sold as not working.
It turned out that the damage to the lid had broken the cable to the power switch. Ten minutes with a soldering iron delivered an externally mounted push switch. This resulted in a base unit that powered up, but took five minutes to boot. This delay was traced to an old CD that was jammed in the laptop's DVD drive. Extracting the CD fixed the boot delay and I now have a working base unit running Linux Mint.
Even though it's an old Core2 Duo with only 4GB of RAM, it's more than adequate for running KiCad, web browsing and running logic analyser and USB oscilloscope software.
Links to Parts
I built this for my Dell laptops, but it also works with my HP machines.
Please consider using the Amazon links below to purchase any parts that you are interested in. A small percentage of the purchase is donated to the FCoVFreeClinic which carries out research into FCoV and FIP treatment in cats.
* DC to DC Step Down Converter Modules
* LCD Controller Board for 1400x900 Panel
* Power Cables with 5.5mm by 2.1mm Connectors
* PCB Power socket from AliExpress, search for "Laptop DC Power Jack for DELL"
* Cable from Project Box to Laptop, search EBay for "DC Tip 7.4x5.0mm Power Plug Socket Connectors + Cord"
